This is only a very short description about how to take hemispherical
photographs of a (forest) canopy. See also our online
videos.
To estimate the leaf area of single trees, there are some
specific requirements to consider.
To take hemispherical photographs, the following material is needed:
The sun should not be on the photographs. There are several possibilities to achieve this goal:
The points from which the photographs are taken should be independent from the structure of the canopy. This is important in order to achieve a representative coverage of the canopy. Walking 'randomly' across the forest is not a good idea because it is impossible not to be somehow influenced by the position of the trees. In a natural canopy, it is best to choose regularly-spaced points on a transect or on a grid (because the trees are supposed to grow independently from the chosen transect or grid). In plantations, it is also possible to work on a transect or grid, but then the spaces and the orientation have to be chosen to cover as well as possible all the positions from the middle of rows to the middle of spaces between rows.
See also our exposure calculator!
At LAI values of 2 or less, it is safe to rely on the aperture and/or speed automatically chosen by the camera. Under denser canopies (and especially for digital cameras), it becomes necessary to underexpose the pictures (Schleppi et al., 2007). Otherwise, the camera tries to compensate for the dark canopy by letting too much light coming through the gaps. This results in a saturation of these gaps, which tend to overflow, to bloom over the dark parts of the picture, 'eating' the edges of the foliage. A good practice is to use the bracketing technique, taking for example 3 photographs from each point:
Some cameras have a bracketing function for 3, 5 or even 7 pictures. This, however, produces both over- and underexposure. An overall underexposure should therefore be applied on top of this setting so as to produce the chosen values. The above example can be achieved with a general underexposure of 1 stop, with a bracketing of ±1. As a rule, 1 1/3 stop of underexposure is necessary for an LAI increasing by 1. The following exposures can thus be recommended as a function of a first estimate of the apparent LAI:
| estimated apparent LAI | recommended underexposure | ||
|---|---|---|---|
| exposure stop | speed factor | aperture factor | |
| 2 | 0 | 100% | 100% |
| 3 | 1 1/3 | 40% | 63% |
| 4 | 2 2/3 | 16% | 40% |
| 5 | 4 | 6% | 25% |
| 6 | 5 1/3 | 2.5% | 16% |
Good cameras have a separate setting for exposure correction. Unfortunately, the range of this correction is often too narrow compared to the large corrections required in dense canopies. In this case, it is necessary to do the correction in manual mode.
Example: automatically, the camera would take the picture in 1/60 s at f/4. The apparent LAI is estimated at 5. The table gives an underexposure of 4 stops. If the speed is reduced, then these 4 stops give 1/1000s. If the aperture is reduced, then 4 stops give f/16. It is also possible to split the 4 stops between speed and aperture, for example 2 stops each, which gives 1/250 s and f/8. Bracketing of ±1 stop could then be achieved by varying the speed to 1/125 and to 1/500 while leaving the aperture at f/8.
The exposure can also be done manually according to measurement done with a
spotmeter. A spotmeter is a device to measure the light intensity in a particular
direction. The measurement zone is typically a circle of one or a few degrees. This
instrument thus allows measuring the light through small gaps in the canopy. We
propose (Schleppi et al., 2007) to overexpose
the pictures between 1 and 2 exposure stops compared to these readings, i.e. by a
factor between 2 and 4. This procedure makes the exposure independent of the
portion of visible sky, thus of the LAI. It keeps the sky bright and the visible
canopy dark, this way enabling a good contrast.
A spotmeter further allows for several light measurements of the sky and/or the
clouds. The variability of these measurements gives an idea about the quality of
the obtained pictures. If different points of the sky differ in their brightness at
most by a factor 2 (= 1 stop), then the pictures should be good. With a factor of 4
(= 2 stops), the determination of a threshold becomes more
problematic. With a factor of 8 (= 3 stops), the sky light is too heterogeneous and
the pictures cannot be analysed satisfactorily.
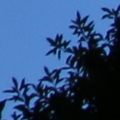
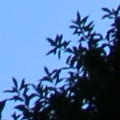
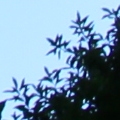
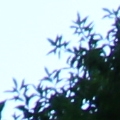
When using bracketing, it is necessary to chose the best picture among each
the different exposures. This is done by checking digital photographs on
a screen and looking carefully at leaves or small branches disappearing when the
exposure increases. The is the so-called blooming effect
(Thimonier et al., 2010). We generally
recommend to chose the highest exposure that does not produce a notable blooming.
In the following bracketing series, the borders of the leaves clearly start to
disappear on the 4th picture, thus the 3rd should be chosen:
Another method consists in examining the colour frequencies od the picture,
their so-called histogram. Such a graph can be displayed on the screen of many
good cameras. It can also be obtained afterwards in many software packages. On
such an histogram, there should be a peak at high light intensities, but this
peak should not be higher than the peak at low light intensities. Hemisfer
also allows to display colour frequencies and thus to use the histogram method
(see in the view menu).
Note that pictures taken under constant light conditions should theoretically all
have the same exposure. If you tend to choose a higher exposure for the pictures
with a denser canopy, then it is a natural, human tendency, but it is wrong.